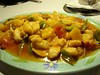
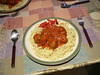
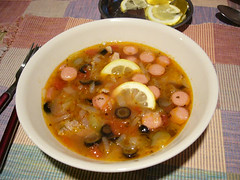
I've been on the lookout for Chinese restaurants that do good
Gongbao Jiding ever since I came to North America--with mixed results most of the time. While the better (i.e., more expensive) restaurants can usually do a good job with it, the same cannot be said for the run-of-mill lunch-special-for-3.99 outfits (usually too watery). Today, I decided to give the dish a go myself--after finding a respectable looking
recipe online (adapted below), and reminding myself that I should be looking for ways to use my small stash of
Szechwan Peppercorn and Dried Chilli. But as usual, I had to take some liberties with the recipe, the most scandalous being the substitution of Extra Virgin Olive Oil for Peanut Oil (I've switched to Olive for practially all of my cooking--including stir fry--for a while by now), and Balsamic Vinegar for
Black Chinese Vinegar (since my last bottle was used up and I wasn't intending to buy a new one just for this). The overall results--I am happy to report--exceeded expectations:
 Recipe
 (as I prepared the dish)
"+" means "and a bit more"
Main Ingredients
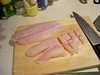
- 1 1/2 boneless
chicken thigh (supposed to be breast) without skin (about 2/3 lb)
- 2
garlic cloves and an equivalent amount of
fresh ginger- 4
scallions (a.k.a. spring onion), white parts only
- 2 tbsp
extra virgin olive oil (supposed to be peanut oil)
- Small handful
dried red chillies (preferably Sichuanese, but I only have generic)
- 1 tsp
whole Sichuan peppercorn (I love this stuff)
- 1/2 cup
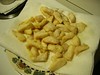
cashew Nuts (bits; traditionally roasted unsalted peanuts; but cashew is supposed to give a grander version of the dish--and in any case, that's what I have today)
Marinade
- 1/2 tsp
salt- 2 tsp
light soy sauce- 1 tsp
Shaoxing rice wine (medium-dry sherry is supposed to do as well)
- 2+ tsp
cornstarch (or 1 1/2 tsp potato flour)
- 1 tbs
water Sauce
- 3 tsp sugar
- 1+ tsp
cornstarch (or 3/4 tsp potato flour)
- 1 tsp
dark soy sauce- 1 tsp
light soy sauce- 3 tsp
Balsamic Vinegar (supposed to be Chinkiang black Chinese vinegar)
- 1 tsp
sesame oil (product of Singapore "Chee Seng" brand, no less)
- 1 tsp
chicken stock (i.e., water + pinch of Knorr chicken broth mix)
Preparation (As it turns out, most of the work is in the preparation (cutting, measuring, etc.). The cooking itself does not take all that long. Hopefully, as I get more experienced with the dish, I will be able to
guesstimate the quantities without having to resort to the measuring spoons all the time. I've rearranged the original instructions to reflect the actual sequence I took more closely.)
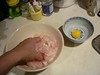
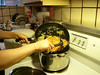
1. Cut the chicken as into 1/2-inch cubes (no need to be too exact
lah). Place in a small bowl and mix in the marinade ingredients. Let sit..
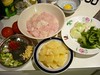
2. Peel and thinly slice the garlic and ginger. Chop scallions into chunks as long as their diameter. Snip the chillies in half or into 2-inch sections, discard as many seeds as possible. Set aside.
3. Combine the sauce ingredients in a small bowl. Set aside.
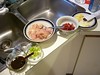

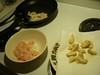
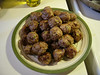
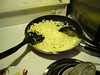
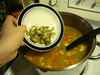
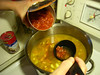
(left: the ingredients all ready for the pan; right: a bevy of seasoning)
Cooking
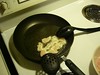
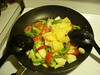
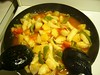
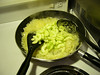
1. Heat Olive Oil over high heat (another scandalous substitution: I use a non-stick pan rather than a wok). Leave one small slice of garlic for testing the temperature--when it begins to sizzle, it's time. Add the chillies and Sichuan pepper and stir-fry briefly until they are crisp and the oil is spicy and fragrant (opening the windows is advised). Take care not to burn the spices. Add the ginger and garlic (they are added later in the original recipe but Wifey prefers her garlic well cooked). Stir.
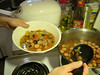
2. Add chicken and fry over high heat, stirring constantly. As soon as the chicken cubes have separated, add the scallions and continue to stir-fry for a few minutes until the meat is cooked through (test one of the larger pieces to make sure).
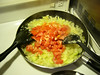
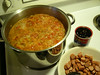
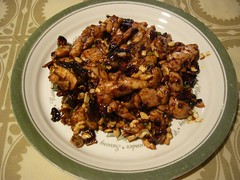
3. Give the sauce a stir and add it to the wok, continuing to stir and toss. As soon as the sauce has become thick and shiny, add the cashew, stir them in, and serve.
(Variations: The same dish can be made with cubes of pork, shrimp, or prawns.)
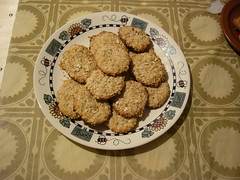
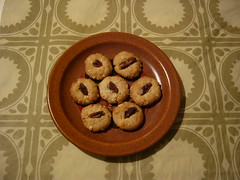
Next stop:
Mapo Tofu,
Iron Chef Chen Kenichi Style.


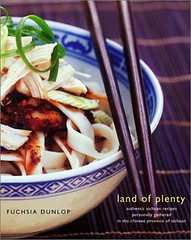 Just arrived in the mail from